When I first started learning how to draft construction blueprints, I was overwhelmed by the complexity. The lines, measurements, and symbols seemed like a foreign language. But with some patience and practice, I quickly learned that drafting is more of a systematic process than anything else.
Whether you’re working on a simple home renovation or a commercial building project, understanding the fundamentals of blueprint drafting is key to creating a plan that works in the real world. I’ll walk you through the process of drafting construction blueprints, from the basics to the finer details.
Why is Drafting Construction Blueprints Important?
Drafting construction blueprints is the foundation of any building project. These plans serve as a map for architects, contractors, and builders to follow when constructing a structure. A clear, accurate blueprint helps ensure the safety, functionality, and efficiency of the final product.
Without blueprints, the risk of mistakes increases, potentially leading to costly delays or structural issues. Proper blueprints also ensure that your project complies with building codes and regulations.
Step-by-Step Process: How to Draft Construction Blueprints
Step 1: Preparation and Setup
Before you dive into drawing, it’s essential to set up properly. Start by determining the scale of your blueprint. Choosing the right scale is crucial to making sure your plan fits onto a sheet of paper while maintaining accuracy. Common scales used for construction drawings include 1/4″ = 1’ or 1/8″ = 1’.
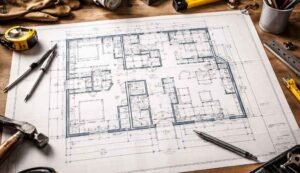
After choosing the scale, establish a title block in the bottom-right corner of your sheet. The title block should include the project name, sheet number, date, scale, and the drafter’s name. Finally, gather all necessary measurements. If you’re working on an existing structure, perform a “walkaround” to measure the walls, doors, and windows accurately.
Step 2: Drafting the Floor Plan
The floor plan is the heart of your blueprint. Begin by sketching the exterior walls. Make sure to account for the thickness of the walls (typically 6 inches for exterior walls to accommodate insulation and plumbing). Next, add the interior walls that define rooms, hallways, and other spaces.
Be sure to leave enough room for fixtures like hallways and closets. Once you have the walls in place, mark the location of openings such as doors and windows. Use standard construction blueprint symbols to indicate the direction of door swings, which tells the builder how much space is needed for the doors to open.
Step 3: Adding Technical Details

Now that you’ve completed the basic floor plan, it’s time to add the technical details. Start with structural elements like load-bearing walls, columns, and foundations. These elements are essential for ensuring the building’s stability. If necessary, create a separate foundation plan that includes footings and concrete strength for permits. Then, layer in mechanical, electrical, and plumbing (MEP) components.
Mark the locations of outlets, switches, light fixtures, and plumbing stacks. It’s vital to use standard MEP symbols here, as these will be universally understood by contractors. To complete the technical details, create elevation and section drawings. Elevations show the exterior appearance of the building from all four sides, while sections are vertical “cut-through” views that show wall layers, insulation, and roof construction.
Step 4: Finalizing and Annotating
Once you’ve finished the drafting process, it’s time to finalize the blueprint. Begin by adding dimension lines for every wall and opening. Be precise—small errors in dimensions can cause significant issues down the line. Ensure that your dimensions are consistent and avoid “closing the string” (i.e., making all dimensions add up to a total that might conflict with the overall footprint).
Next, include general notes that specify materials and construction techniques, as well as schedules that list the size and type of doors and windows. Finally, ensure that your blueprints comply with local building codes. In many areas, a professional architect or engineer must stamp your plans to be approved for building permits.
Frequently Asked Questions (FAQs)
1. What software is best for drafting construction blueprints?
For beginners, AutoCAD is one of the most popular tools for drafting construction blueprints. It offers a range of features, from drawing floor plans to adding MEP elements. Revit is another great choice for more advanced projects, particularly when working with 3D models. For those just starting, free tools like SketchUp or even Floorplanner can help you get a feel for blueprint drafting.
2. Can I draft a blueprint by hand?
Yes, you can absolutely draft blueprints by hand, and many professionals still do it for smaller projects. You’ll need graph paper, a scale ruler, and some drawing tools. Hand drafting is slower than digital methods, but it gives you a great understanding of the process. It’s also an option if you’re working on a personal project or need to create something quickly without digital tools.
3. How accurate should my blueprint be?
Accuracy is essential when drafting blueprints. Even small errors in measurements can result in major issues down the line, such as structural problems or costly reworks. Always double-check your measurements and ensure that your scale is consistent throughout the drawing. Professional blueprints often require a licensed architect or engineer to review and verify the design for compliance with building codes.
4. Do I need to hire a professional to draft my blueprints?
It depends on the complexity of your project. For a simple home renovation or a small DIY project, you can likely draft your own blueprints. However, for larger projects, like a multi-story building or commercial construction, it’s best to hire a professional. Architects and engineers have the expertise to ensure that your blueprints are not only functional but also meet local building codes and regulations.
You’re Ready to Draft Your Blueprint!
Drafting construction blueprints may seem daunting at first, but with a little practice and patience, you’ll find that the process is both rewarding and empowering. By following these steps and using the right tools, you can create a solid foundation for your construction project.
Whether you’re working on a DIY project or a professional build, drafting a blueprint is the first step toward bringing your vision to life. So, grab your ruler, fire up your design software, and start drafting your blueprint today!