When I first heard about rainwater harvesting system design, I thought it was something reserved for eco-warriors with massive homesteads. I couldn’t have been more wrong! Once I started looking into it, I realized how easy and cost-effective it could be to set up a system in my own backyard. The idea of capturing rainwater that would otherwise run off and be wasted was both simple and brilliant.
If you’ve been curious about creating a rainwater harvesting system design, you’re in the right place! Read through everything you need to know to design a system that’s both practical and sustainable.
What Is a Rainwater Harvesting System and Why Do You Need One?
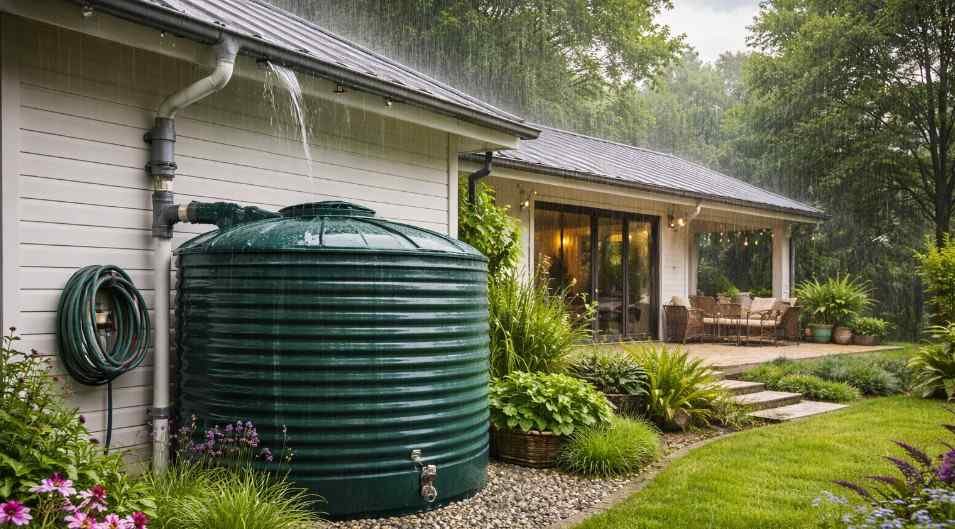
At its core, a rainwater harvesting system design is about capturing rainwater from your roof and storing it for later use. It’s an environmentally friendly way to conserve water, reduce utility bills, and even help your garden thrive. You’ll use a combination of components like gutters, storage tanks, and filters to make sure the water is clean and available when you need it.
You could be using the water for irrigation, washing your car, or even drinking (with the proper filtration), a rainwater harvesting system is a fantastic way to make the most out of nature’s free resource.
What Are the Core Components of a Rainwater Harvesting System Design?
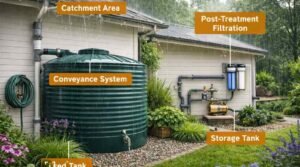
Designing your own rainwater harvesting system requires understanding the five core components that make it all come together. Let’s break these down to help you get started on your system.
1. Catchment Area: Your Roof

The catchment area is where the magic happens. It’s typically your roof, where rainwater collects before it flows down into the gutters. The material of your roof matters. Materials like metal or tile are great because they’re non-toxic, durable, and don’t deteriorate easily. Keep your roof clean and free of debris for the best results.
2. Conveyance System: Gutters and Downspouts
Water from your roof needs to be channeled to the storage tank, and that’s where the conveyance system comes in. This consists of gutters and downspouts that direct the water to the tank. Make sure your gutters are sloped correctly (about 0.5% or 1 inch per 16 feet) to ensure water flows smoothly. Clean gutters are essential to avoid clogs that can disrupt the system.
3. Pre-Storage Filtration: Keeping It Clean
Before water hits your storage tank, you’ll need a pre-storage filtration system. This typically includes leaf screens and first-flush diverters. First-flush diverters are important because they redirect the initial “dirty” water—containing dust, bird droppings, or other debris away from the tank. This ensures your water is cleaner and safer for use.
4. Storage Tank (Cistern): The Heart of the System
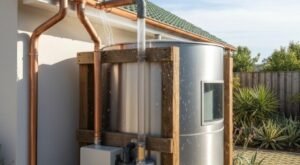
The storage tank is where all the collected water is stored. Tanks come in a variety of sizes and materials, including plastic, metal, and concrete. It’s important that your tank is opaque to prevent algae growth, and it should be screened to keep out mosquitoes and debris. The size of your tank will depend on how much water you plan to use, as well as the average rainfall in your area.
5. Distribution & Post-Treatment: Getting the Water to You
After the water is stored, it needs to be distributed to where it’s needed. This is where the distribution system (pumps and pipes) comes into play. If you’re using rainwater for potable (drinking) water, you’ll need to invest in post-treatment systems like UV disinfection and carbon filters to ensure the water is safe for consumption.
How to Design Your Own Rainwater Harvesting System: A Step-by-Step Guide
Ready to get your hands dirty? Let’s walk through the process of designing a rainwater harvesting system step by step.
Step 1: Determine Your Water Needs
Before diving into the physical design of the system, the first thing you need to do is figure out how much water you’ll need. If you’re using it for irrigation, your needs will be different than if you’re using it for drinking. Use an online calculator to estimate how much water your roof will yield per inch of rainfall. A common rule of thumb is that a 1,000-square-foot roof can collect roughly 600 gallons of water per inch of rain.
Step 2: Assess Your Roof and Gutters
Next, evaluate your roof’s surface area and the condition of your gutters. The larger your roof, the more water you’ll be able to collect. Check that your gutters are free from debris and sloped properly for maximum water flow. If your gutters need repairs or replacement, do that before proceeding.
Step 3: Choose the Right Storage Tank
The size of your storage tank depends on how much water you want to collect and how much space you have. Above-ground tanks are easier to install and cost less, but if you’re tight on space or want a more aesthetic option, consider an underground tank.
Make sure your tank is large enough to hold the amount of water your system can collect, and remember that a gallon of water weighs about 8.34 pounds.
Step 4: Install Filtration Systems
Install a first-flush diverter at the start of the conveyance system to ensure only the cleanest water enters your tank. Depending on your needs, you might also install additional filtration methods, like sand or charcoal filters, before the water is stored.
If you’re planning to use the water for potable purposes, consider a more advanced filtration system with UV or carbon treatment.
Step 5: Connect Everything and Start Collecting
Once your system is designed, it’s time to install the pipes, pumps, and storage tank. Connect everything properly, ensuring that water flows smoothly from the roof to the tank. Once the system is set up, you’re ready to start collecting rainwater!
Frequently Asked Questions
1. Can I drink the rainwater I collect?
Yes, you can! But only if your system is designed for potable (drinking) water. This means investing in higher-level filtration and ensuring your catchment area (roof and gutters) is clean and non-toxic. Always check local guidelines for safe rainwater harvesting.
2. How much water can my roof collect?
On average, a 1,000-square-foot roof can collect about 600 gallons of water per inch of rainfall. To calculate exactly how much water you can collect, use an online rainwater harvesting calculator, which factors in roof size, rainfall averages, and system efficiency.
3. How do I maintain my rainwater harvesting system?
Regular maintenance includes cleaning the gutters and roof, checking the filtration system, and ensuring that the tank is free of debris. Depending on your system, you may also need to clean the tank or replace filters every 6–12 months.
4. How much does a rainwater harvesting system cost to install?
The cost of installing a rainwater harvesting system design depends on your system’s size and complexity. A simple system can start at around $500, while larger systems with professional installation can range from $2,000 to $10,000 or more. However, it’s an investment that can save you money in the long run.
Ready to Harvest the Rain?
If you’re looking to make your home more sustainable, a rainwater harvesting system design is one of the best investments you can make. Not only does it save water and reduce your utility bills, but it also contributes positively to the environment. So why wait? Start small with a few rain barrels and work your way up to a more complex system. You’ll feel good knowing you’re making a difference—one raindrop at a time.
As a bonus tip, don’t forget to regularly check your system for any clogs or issues. A well-maintained system will last longer and continue to provide you with free, sustainable water for years to come. Happy harvesting!