Installing a garden irrigation system can be a game-changer for anyone with a garden. I remember my early days of gardening when I’d forget to water my plants and watch them droop in the heat. I was tired of playing catch-up, and that’s when I decided to install a garden irrigation system.
Let me tell you, it was a decision I’ll never regret. From saving water to maintaining a lush garden with less effort, the system paid off. If you’ve been wondering how to install garden irrigation system to make your life easier, you’ve come to the right place!
What is a Garden Irrigation System?
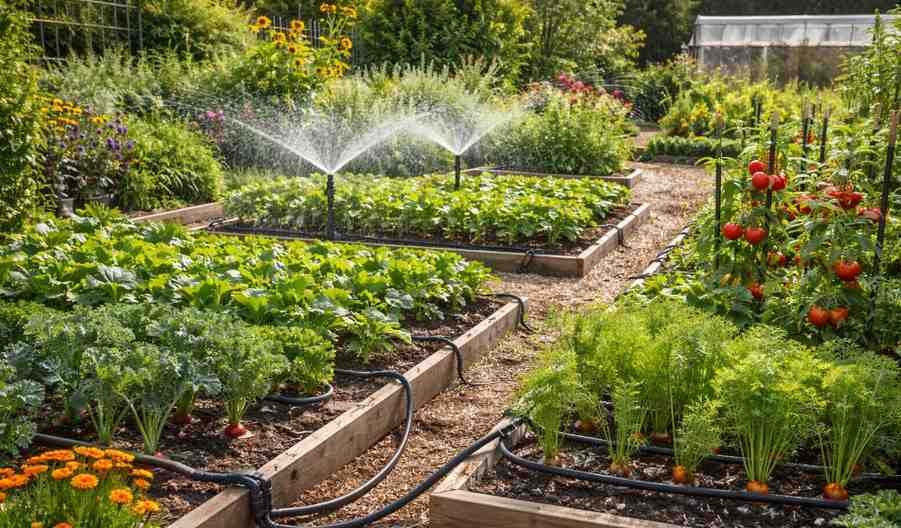
A garden irrigation system is designed to deliver water to your plants in a controlled and efficient way. There are various types, including drip irrigation, soaker hoses, and sprinkler systems. The goal is to ensure that your plants receive the right amount of water without wasting a drop.
Drip irrigation, in particular, is excellent because it targets the plant roots directly, providing them with consistent moisture and minimizing evaporation. Installing an irrigation system not only saves time but also helps you conserve water, making it an environmentally friendly solution.
Why Install a Garden Irrigation System?
If you’re still on the fence about setting up an irrigation system, let me tell you—this is one of the best investments you can make for your garden. First, it saves you time. No more dragging hoses around or trying to remember which areas of the garden need water. Second, it conserves water.
Traditional irrigation methods often waste water through evaporation or runoff, but irrigation systems deliver water directly to the roots where it’s needed most. Plus, a good system will ensure that every plant gets the right amount of water, which promotes healthier growth.
How to Install Garden Irrigation System
Ready to get started? Let’s go over the steps to set up your irrigation system.
Step 1: Plan Your Garden Layout
Before you dive into the installation process, take the time to map out your garden. Identify the areas where your plants are located and group them by their watering needs. For example, leafy vegetables might require more water than drought-tolerant herbs.
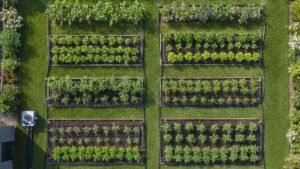
Also, take note of any obstacles, like pathways or trees, that could affect your system’s layout. Drawing a rough garden layout will help you plan where the pipes and emitters should go.
Step 2: Choose Your Irrigation System Type
When it comes to garden irrigation, there are a few options to choose from:
- Drip Irrigation: Perfect for vegetable gardens, flower beds, and shrubs. It delivers water directly to the plant’s roots, reducing water waste.
- Sprinklers: Best for larger lawns or areas that need broader coverage.
- Soaker Hoses: These are ideal for beds and rows of plants, delivering water gently and evenly.
For this guide, we’ll focus on the drip irrigation system, which is one of the most water-efficient systems out there.
Step 3: Gather Your Supplies
To get started, you’ll need a few key materials:
- Drip tubing (mainline and feeder lines)
- Emitters (drippers, sprayers, or bubblers)
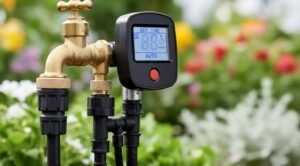
- Pressure regulator
- Timer (optional but helpful)
- Backflow preventer
- Filtration system
- Stakes or staples to secure the tubing
You can find most of these supplies at your local garden center or online. Be sure to check that the tubing and emitters are compatible with your chosen system.
Step 4: Install the Main Distribution Line
Now that you’ve got your materials, it’s time to lay down the main distribution line. Begin by unrolling the 1/2-inch mainline tubing. Let it sit in the sun for about 30 minutes to make it more flexible and easier to work with.
Run the tubing from your water source to the garden beds, using elbows or T-connectors for corners or branching paths. Secure the tubing to the ground with landscape staples to keep it in place.
Step 5: Install Emitters and Feeder Lines
Once the main line is in place, it’s time to install the emitters. Use a punch tool to make holes in the tubing near each plant. Insert a barbed connector into the hole and attach a 1/4-inch feeder line to it.
Then, place an emitter (such as a dripper or bubbler) at the end of the feeder line, aiming it toward the plant’s root zone. Make sure to check the flow rate of the emitters to ensure your plants are getting the right amount of water.
Step 6: Test the System
Before sealing everything up, it’s essential to test your system. Turn on the water and check for leaks at the connectors and emitters. Make sure that each plant is getting enough water and that the emitters are properly adjusted.
Run the system for a few minutes to flush out any dirt or debris in the lines. Afterward, cap the ends of the tubing with end caps to seal the system.
Frequently Asked Questions
1. How much water does a garden irrigation system use?
The amount of water your system uses depends on several factors, including the type of irrigation system, the size of your garden, and the watering needs of your plants. On average, a drip irrigation system uses about 1/2 to 1 gallon of water per plant per week, which is far less than traditional watering methods.
2. Can I install a garden irrigation system myself?
Yes! Installing a garden irrigation system is a DIY-friendly project that most homeowners can complete in a day or two. As long as you have the right tools and materials, the process is straightforward. Just be sure to follow the instructions and test the system before finalizing the installation.
3. What’s the best time of year to install a garden irrigation system?
The best time to install a garden irrigation system is in early spring or fall. These seasons allow you to test your system while the weather is mild, and your garden is in its growing phase. Installing in the fall is also great for preparing your garden for the next season.
4. How can I save even more water with my system?
To maximize water savings, consider adding a rain sensor or timer to your irrigation system. A rain sensor will automatically shut off the system when it detects rainfall, preventing overwatering. A timer will ensure that your plants are watered on a consistent schedule, helping you avoid waste.
Keep Your Garden Thriving with Ease
Installing a garden irrigation system doesn’t have to be a complicated project. With a little planning and the right materials, you can have an efficient, water-saving system in place in no time. Not only will it make watering easier, but it’ll also keep your plants healthy and thriving throughout the year.
So, roll up your sleeves, follow these steps, and enjoy a lush garden without the hassle of manual watering. Happy gardening, and don’t forget to pat yourself on the back for making such an environmentally friendly and time-saving choice!


")


